Add Devices
Windows
Add New Devices
To efficiently integrate new devices into Microsoft Intune, there are some important points to consider when placing an order. If these requirements are met, the devices will already be pre-provisioned for your tenant from the factory, and integration into Microsoft Intune will be seamless.
Requirements for ordering Autopilot devices:
- Windows 11 Pro License: The devices should have at least a valid Windows 11 Pro license.
- TPM 2.0 Module: All devices must have a TPM 2.0 module to meet security requirements.
- Pre-installed Windows: The devices should be delivered with a pre-installed Windows version.
- No Bloatware: Ideally the devices should not contain any pre-installed bloatware.
Note
Avoid purchasing self-assembled devices from small IT retailers, as these often do not meet the required hardware requirements (e.g. TPM module, driver certification) and can therefore lead to additional effort.
Add Devices Before Delivery
When you purchase an Autopilot device from a manufacturer, provide your TenantID when placing the order. This is the most convenient method, as the manufacturer registers the devices directly in your tenant.
You can communicate the device categories in Numiato directly to the hardware partner. The manufacturer then stores the corresponding category name as "OrderID". This means that the devices are already assigned to the desired category upon delivery.
| Category | OrderID Tag |
|---|---|
Teacher Devices |
Teacher Devices |
Student Devices |
Student Devices |
Administration Devices |
Management Devices |
Student (Shared Devices) |
Shared Student Devices |
Teacher (Shared Devices) |
Shared Teacher Devices |
Administration (Shared Devices) |
Shared Administration Devices |
Custom Category |
Name of the category |
After delivery, you simply need to turn on the device, and the entire configuration is automatically handled by Microsoft Intune. This means the devices can even be handed directly to teachers or students still in the packaging, and they configure themselves on first startup.
Tip
Take advantage of the option to purchase devices directly from the manufacturer as Autopilot devices. This saves you considerable time and simplifies integration into Microsoft Intune.
Info
Some manufacturers will also send you a link to confirm the registration of the hash values.
Add Devices After Delivery
Often smaller hardware retailers cannot pre-register the devices in your tenant. These retailers often still sell the devices as Autopilot devices. In that case, you should request a suitable .csv file from these retailers that contains one of the following data.
- Hardware Hash (this is not the serial number!)
- Microsoft Product Key ID (13 digits)
Danger
Insist on this file in the correct format. The device was explicitly sold to you as an Autopilot device and the retailer should fulfill their obligation to make these devices enrollable in your tenant.
Once you have received the CSV file, import it into Numiato as follows:
- Navigate to Numiato Device Management and select the Windows tab.
- Click Import.
- Select a device category — this is mandatory.
- Upload the CSV file via drag-and-drop or the file picker.
- Click Import to start the process.
- You can monitor the import status in Status & History.
Add Existing Devices
To enroll existing devices in Microsoft Intune, there are several options. For schools, enrolling devices via Autopilot is most practical. This requires that existing devices be manually pre-registered. The "Hardware Hash" is determined from the devices. This is a long hash value determined via a script. The hashes are stored in a .CSV file. The following steps need to be completed:
- Determine hardware hash
- Submit hardware hash
- Reset the computer
Warning
Windows 10 requires at least version 1809 to reliably determine hashes on all devices.
Already Installed Windows 10/11 Device
Danger
This will delete all data and programs from the device!
- Download the following Autopilot Script.
- Extract the script to an empty FAT32 formatted USB stick.
- Run the file "StartAutopilot.bat" on the device you want to add.

-
The hardware hash will now be determined and saved to the computers.csv file. Once you see the green text, you can close the window.

-
A file called computers.csv should now be found on the USB stick. This should receive one additional entry per computer. Check this regularly when adding multiple computers with this method.
- Import the file in Numiato: navigate to Numiato Device Management → Windows → Import, select a device category, and upload the CSV file. You can monitor the status in Status & History.
- Reset the device completely. Choose one of the following methods:
Option A: Reinstall via USB Stick
- Download the Media Creation Tool and create a bootable USB stick.
- Boot from the USB stick.
- Install Windows 10/11.
- Go through the out-of-box experience (region, language, keyboard layout, Wi-Fi).
- Sign in with an account to complete enrollment.
Option B: Reset via Settings
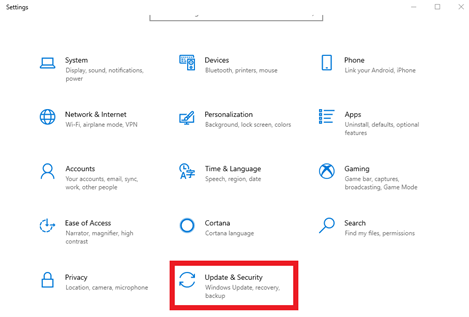
-
Open Settings → Update & Security.
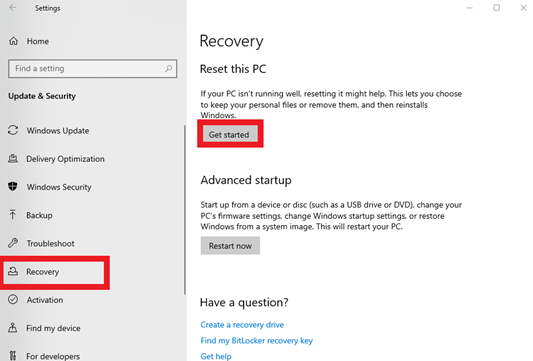
-
Click Recovery → Reset this PC.
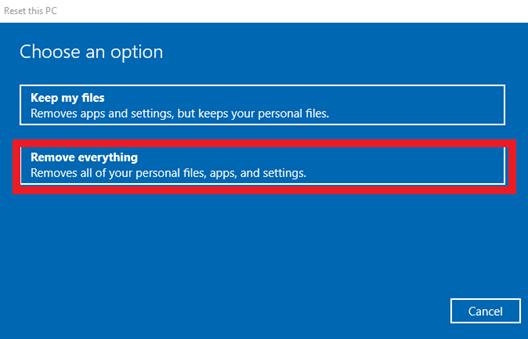
-
Select Remove everything.
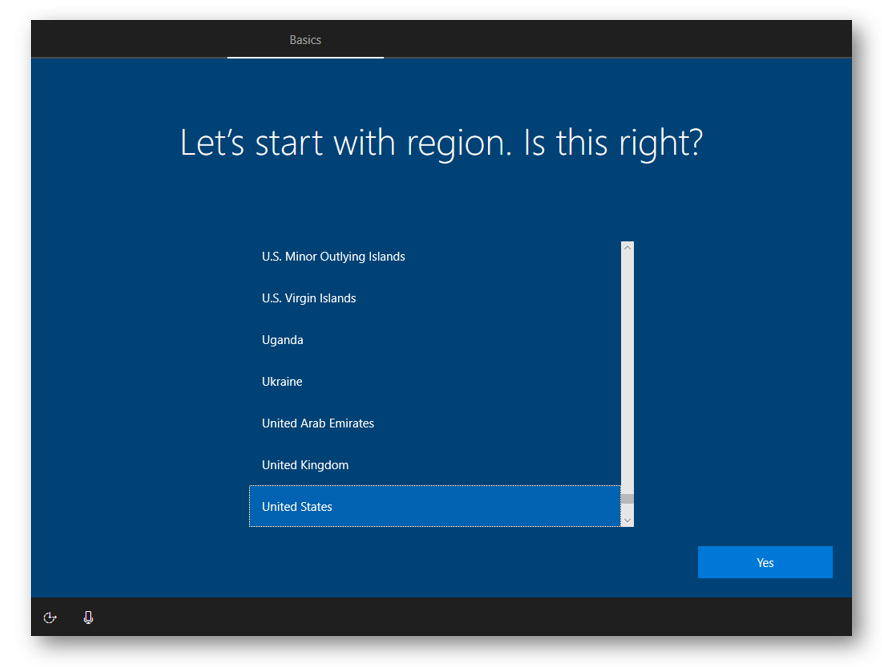
-
Go through the out-of-box experience (region, language, keyboard layout, Wi-Fi).
- Sign in with an account to complete enrollment.
Newly Delivered Windows 10/11 Device
Use this option if you want to enroll a new Windows 10/11 device that was not purchased as an Autopilot device.
Attention
The device must be at minimum Windows 10/11 Pro Edition. Windows Home is not supported. If your device has Windows Home pre-installed, Windows 10 Pro Education must be installed first. More information can be found in our FAQ section
- Download the following Autopilot Script.
- Extract the script to an empty FAT32 formatted USB stick and insert it into the device to be enrolled.
-
Start the new device until you see the following window.
-
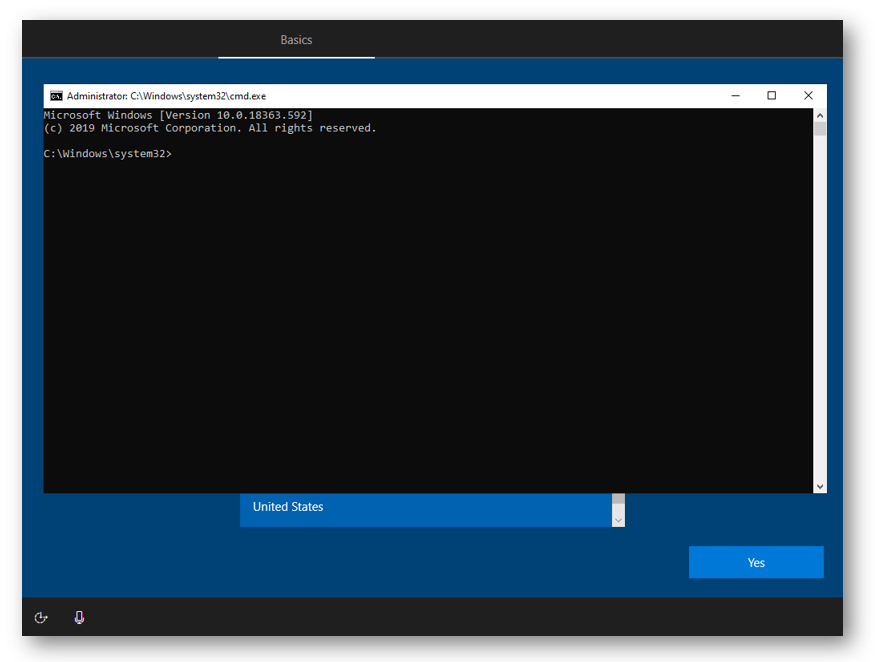
Press Shift+F10/F11 simultaneously on the keyboard to open a CMD window.
-
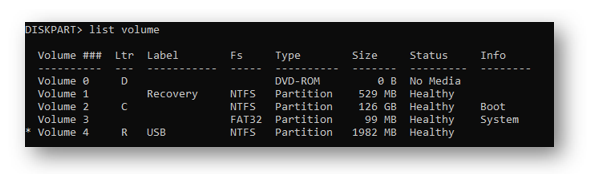
Next, we need to find the drive letter for our USB drive. Enter DISKPART and then "list volume". We can see that the USB stick was assigned the letter "R".
-
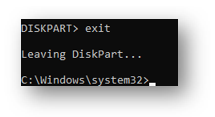
Exit DISKPART by entering "EXIT".
-
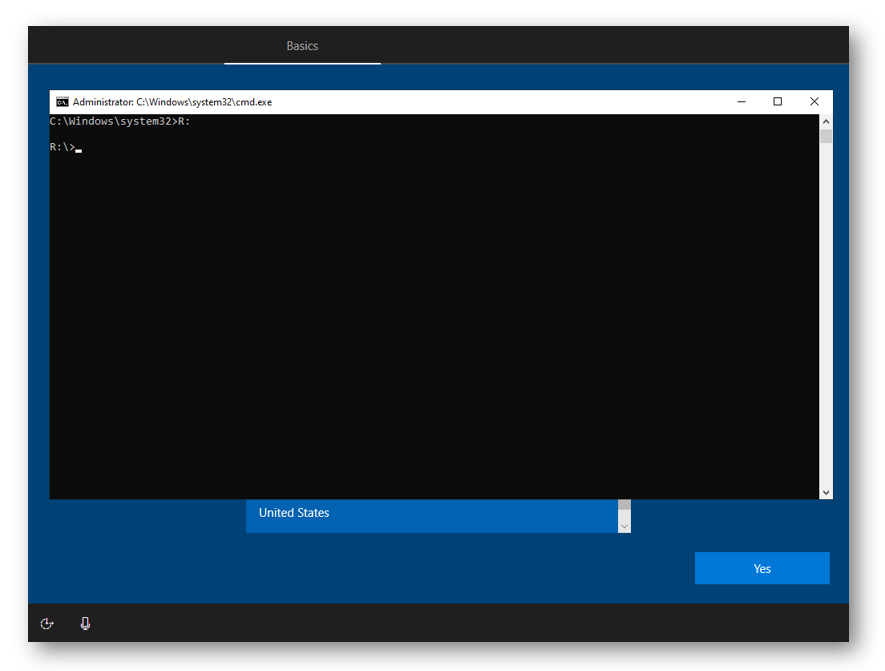
Switch to that drive. Simply enter the drive letter followed by a colon.
-
Run the file "StartAutopilot.bat" on the device.
- A file called computers.csv should now be found on the USB stick. This should receive one additional entry per computer. Check this regularly when adding multiple computers.
- Import the file in Numiato: navigate to Numiato Device Management → Windows → Import, select a device category, and upload the CSV file. You can monitor the status in Status & History.
- Go through the out-of-box experience. Here Windows will ask you, depending on settings and whether an Ethernet connection is present, about region, language, keyboard layout, and Wi-Fi.
- Sign in with an account to complete enrollment.
macOS
Add New Devices
To enroll new macOS devices in Numiato, they must be ordered as Apple School Manager (ASM) devices. This allows the retailer to enroll the devices in your Apple School Manager. From there they are automatically synchronized with Numiato and can be categorized directly.
Note
Setting up Apple School Manager is a prerequisite for macOS management. The configuration is performed by our team. More information can be found under Platform Status.
MDM Assignment in Apple School Manager
Devices must be assigned to the Numiato MDM in Apple School Manager for them to be synchronized.
Add Existing Devices
If you have existing Mac devices that are not yet registered in Apple School Manager, these must be manually enrolled.
Preparation
- Download the Apple Configurator app from the App Store on an iPhone or iPad. The app can also be installed on a personal device — no personal data is transferred and the device is not affected in any way.
- Open the app and sign in with your Apple School Manager account. The account used requires the Gerätemanager role or higher in Apple School Manager.
Enroll the Device
- Reset the Mac device to factory settings and click through the setup assistant until the Wi-Fi screen.
- Hold the iPhone/iPad with Apple Configurator open close to the Mac (a few centimeters). The app will automatically detect the device via Bluetooth/NFC.
- A prompt appears in the app — tap Add to [School Name] to enroll the device in your Apple School Manager.
- Go to Apple School Manager and assign the Numiato MDM to the device.
- The Mac will now display an Erase Mac button. Tap it so the device picks up the MDM assignment and restarts.
Categorize in Numiato
-
Wait until the device appears in the Numiato Device Management under unregistered devices.
Tip
Newly enrolled devices only appear in Numiato after a sync. Click Refresh in the Numiato Device Management to manually trigger a sync with Apple School Manager. This can be done at most once every 15 minutes.
-
Assign the device to a category.
- Wait up to 15 minutes for the device to receive the new category assignment.
- Commission the device.
iPads
Add New Devices
To conveniently enroll new devices in Microsoft Intune, there are some things to consider when placing an order. If you follow these requirements, enrolling new devices in Microsoft Intune is comfortable and easy, as these are already pre-provisioned for your tenant from the factory.
The device must be ordered specifically as an Apple ASM (Apple School Manager) device. This allows the retailer to enroll the devices in your Apple School Manager. These are then automatically synchronized with Numiato and can already be categorized there. Please take note of this if you need to put the devices out for tender.
MDM Assignment in Apple School Manager
Devices must be assigned to the Numiato MDM in Apple School Manager for them to be synchronized.
Add Existing Devices
If you already have devices in your inventory and they are not enrolled in Apple School Manager, you must manually enroll the iPads.
Preparation
- Download the Apple Configurator app from the App Store on an iPhone or iPad. The app can also be installed on a personal device — no personal data is transferred and the device is not affected in any way.
- Open the app and sign in with your Apple School Manager account. The account used requires the Gerätemanager role or higher in Apple School Manager.
Enroll the Device
- Reset the iPad to factory settings via the settings menu or via iTunes/Finder and click through the setup assistant until the Wi-Fi screen.
- Hold the iPhone/iPad with Apple Configurator open close to the iPad to be enrolled (a few centimeters). The app will automatically detect the device via Bluetooth/NFC.
- A prompt appears in the app — tap Add to [School Name] to enroll the device in your Apple School Manager.
- Go to Apple School Manager and assign the Numiato MDM to the device.
- The scanned iPad will now display an Erase iPad button. Tap it so the device picks up the MDM assignment and restarts.
Categorize in Numiato
-
Wait until the device appears in the Numiato Device Management under unregistered devices.
Tip
Newly enrolled devices only appear in Numiato after a sync. Click Refresh in the Numiato Device Management to manually trigger a sync with Apple School Manager. This can be done at most once every 15 minutes.
-
Assign the iPad to a category.
- Wait up to 15 minutes for the device to receive the new category assignment.
- Commission the iPad.